Control Flow in JavaScript: If, Else, and Switch Explained

When writing programs, we often need the code to make decisions. Sometimes the program should do one thing, and sometimes it should do something else depending on a condition. This concept is called control flow.
In simple terms, control flow decides which part of the code runs and when.
Think of it like real-life decision making.
For example:
If it is raining → take an umbrella
If your exam score is above 50 → you pass
If it is Sunday → relax
Programming works in a similar way. JavaScript provides several control structures to handle these situations.
What is Control Flow in Programming?
Control flow refers to the order in which statements in a program are executed.
Normally, code runs from top to bottom. But with control flow statements, we can change that order based on conditions.
For example:
let age = 20;

if (age >= 18) {
  console.log("You are eligible to vote.");
}
Here the message only prints if the condition is true.
The if Statement
The if statement is the simplest decision-making structure in JavaScript.
It checks a condition and runs a block of code only if that condition is true.
Syntax
if (condition) {
  // code runs if condition is true
}
Example
let marks = 75;

if (marks >= 50) {
  console.log("You passed the exam.");
}
If the marks are 50 or more, the message will appear.
The if-else Statement
Sometimes we want one action when a condition is true and another when it is false. That’s where if-else comes in.
Syntax
if (condition) {
  // code if true
} else {
  // code if false
}
Example
let age = 16;

if (age >= 18) {
  console.log("You can vote.");
} else {
  console.log("You are too young to vote.");
}
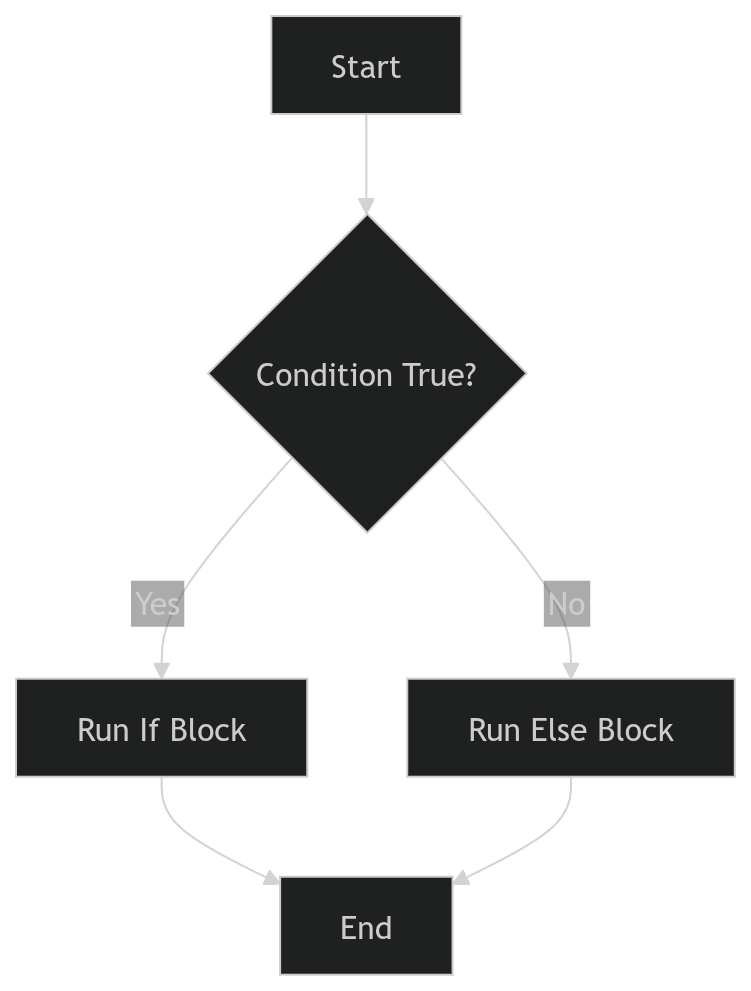
Only one block runs depending on the condition.
Diagram: If-Else Decision Flow
The else if Ladder
When there are multiple conditions, we use else if.
This allows the program to check conditions one by one until one of them is true.
Example
let marks = 82;

if (marks >= 90) {
  console.log("Grade A");
} else if (marks >= 75) {
  console.log("Grade B");
} else if (marks >= 50) {
  console.log("Grade C");
} else {
  console.log("Fail");
}
The program checks conditions from top to bottom.
Once a condition is true, the rest are skipped.
The switch Statement
The switch statement is used when we want to compare one value with many possible cases.
It often looks cleaner than multiple if-else statements.
Syntax
switch (expression) {
  case value1:
    // code
    break;

  case value2:
    // code
    break;

  default:
    // runs if no case matches
}
Example: Day of the Week
let day = 3;

switch (day) {
  case 1:
    console.log("Monday");
    break;

  case 2:
    console.log("Tuesday");
    break;

  case 3:
    console.log("Wednesday");
    break;

  case 4:
    console.log("Thursday");
    break;

  case 5:
    console.log("Friday");
    break;

  case 6:
    console.log("Saturday");
    break;

  case 7:
    console.log("Sunday");
    break;

  default:
    console.log("Invalid day");
}
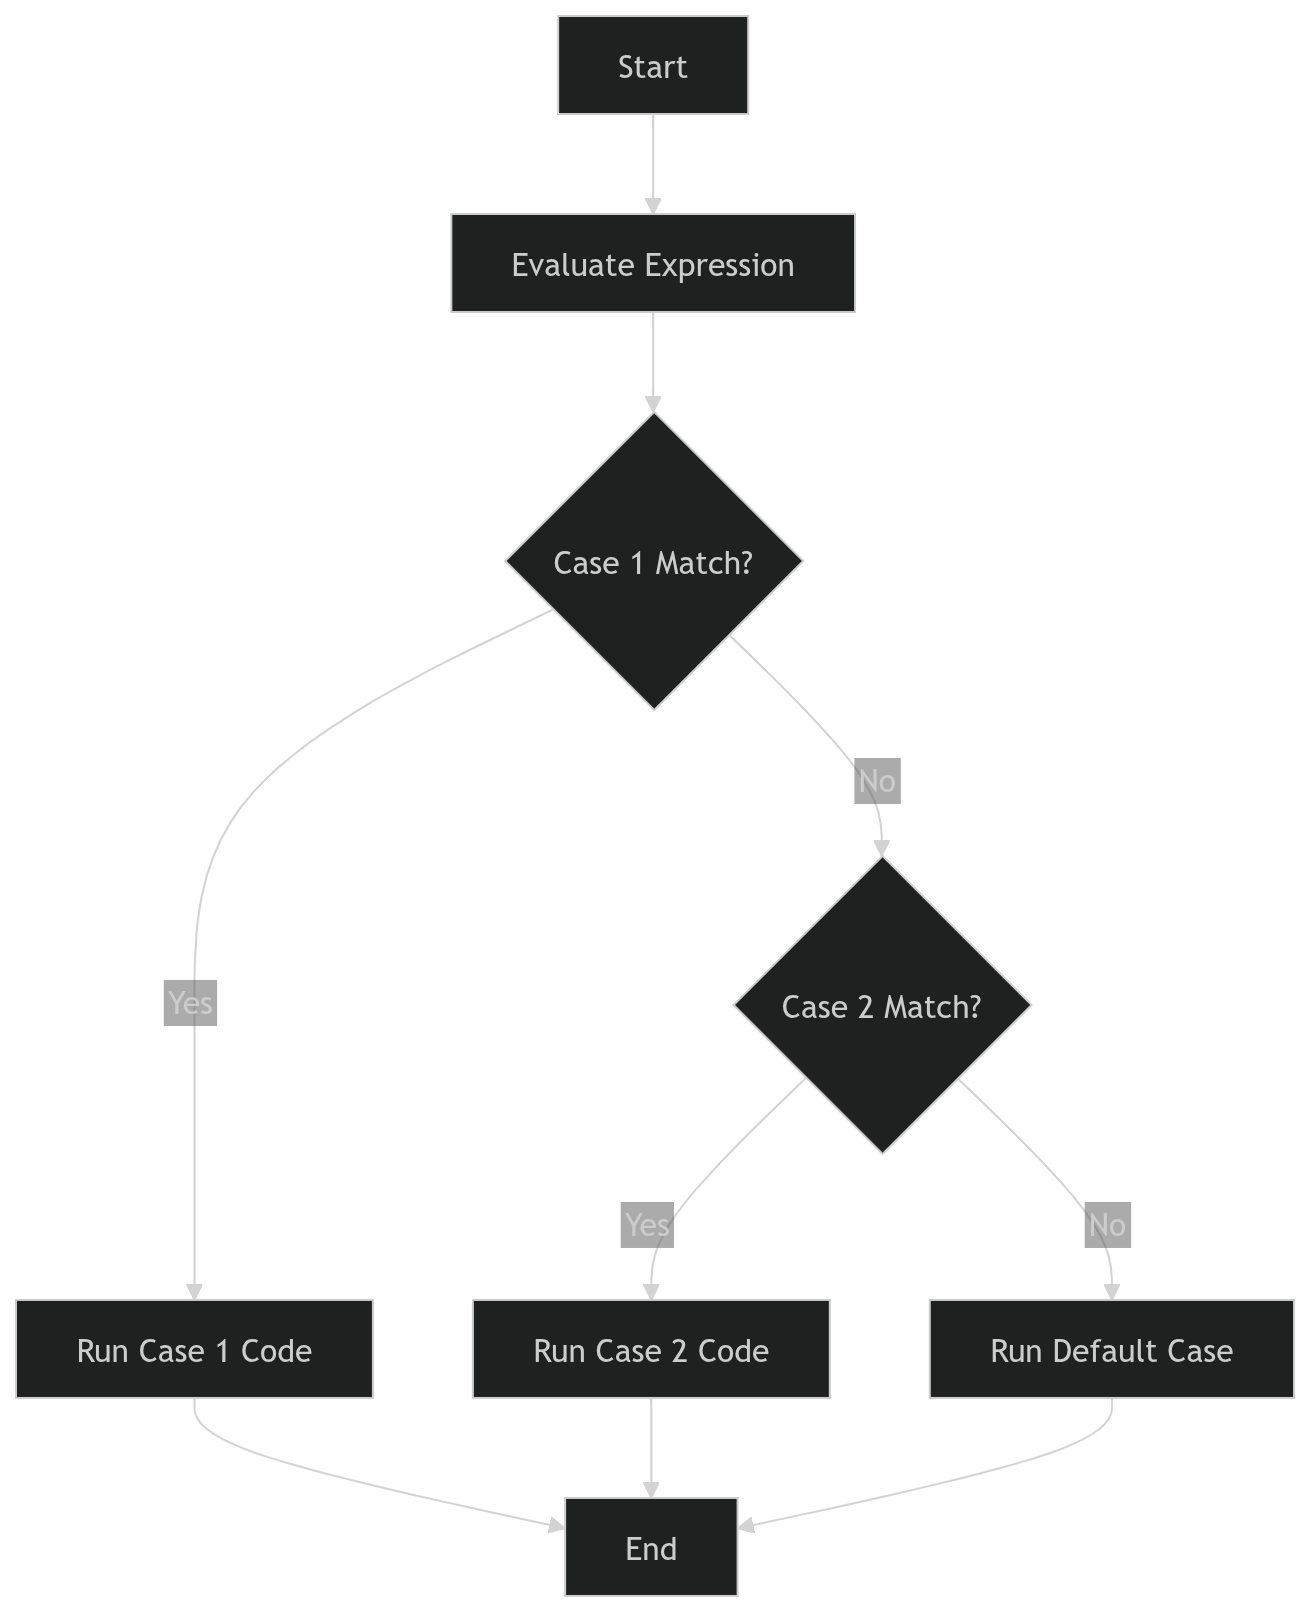
Diagram: Switch Case Flow
Why break is Important in Switch
The break statement stops the execution of the switch once a match is found.
Without break, JavaScript will continue running the next cases.
Example without break:
let day = 1;

switch (day) {
  case 1:
    console.log("Monday");
  case 2:
    console.log("Tuesday");
}
Output:
Monday
Tuesday
This happens because execution falls through to the next case.
When to Use switch vs if-else
| Situation | Best Choice |
|---|---|
| Checking ranges (marks, age etc.) | if-else |
| Comparing one value with many options | switch |
| Complex logical conditions | if-else |
| Simple value matching | switch |
Example:
Checking grades → if-else
Checking day number → switch
Assignment Practice Examples
Check if a Number is Positive, Negative, or Zero
let number = -5;

if (number > 0) {
  console.log("Positive number");
} else if (number < 0) {
  console.log("Negative number");
} else {
  console.log("The number is zero");
}
We use if-else here because we are checking different ranges of values.
Print the Day of the Week Using Switch
let day = 5;

switch (day) {
  case 1:
    console.log("Monday");
    break;

  case 2:
    console.log("Tuesday");
    break;

  case 3:
    console.log("Wednesday");
    break;

  case 4:
    console.log("Thursday");
    break;

  case 5:
    console.log("Friday");
    break;

  default:
    console.log("Invalid day");
}
Here switch is useful because we are matching one value with multiple fixed options.